HA-T-102 Juggernaut |
|
|---|---|
 |
|
| Location | Central Belius—Liberation Front Fortress "The Wall" |
| Mission | Operation Wallclimber |
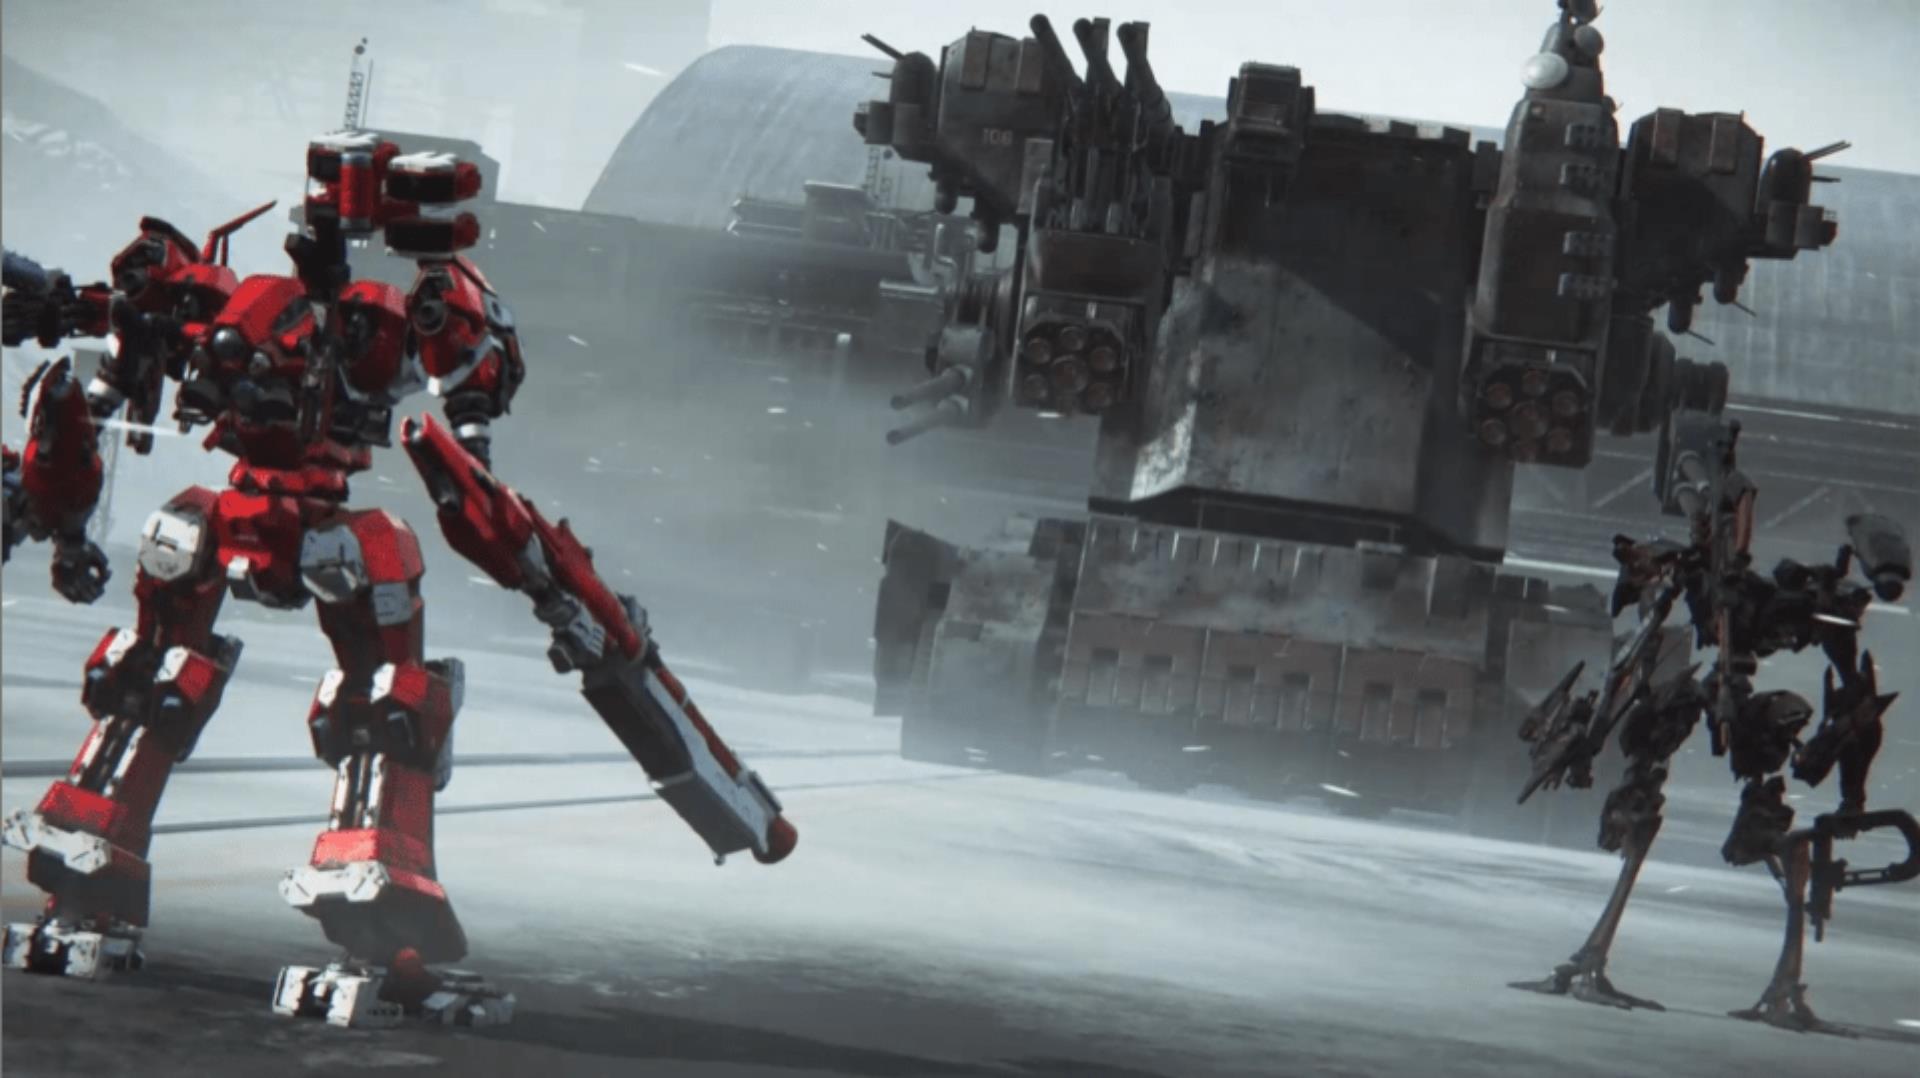
HA-T-102 Juggernaut is a Boss in Armored Core 6. HA-T102 Juggernaut is a Boss encountered in Mission Chapter 1: Operation Wallclimber. In this mission, players will have to first get through the field to get to the wall, destroying all the gatling cannons and tetrapod MTs along the way. Once all are destroyed, players can make their way in the wall reaching the top. There will be smaller machines to destroy along the way. When players get to the top, that's where the real challenge is, to destroy the HA-T-102 Juggernaut.
HA-T102 Juggernaut Armored Core 6 Boss Information
HA-T102 Juggernaut is a boss encountered in the Operation Wallclimber Mission.
- This is not an optional boss
- Health: 63985
- The HA-T102 Juggernaut is a large tank machine that lies on the top of the wall. The Juggernaut can charge toward players and bump them as they drift, as well as shoot missiles as well as cannons. As the Juggernaut drifts, it will leave a trail of bombs as well.
- Weak Against: Energy damage
- Strong Against: Shock damage
HA-T102 Juggernaut AC6 BOSS STATS
- AP: 63985
- Attitude Stability: 1600
- Anti-Kinetic Defense: 1210
- Anti-Energy Defense: 177
- Anti-Explosive Defense: 361
- Shock Resistance: 35%
- Shock Limit: 999
- Incendiary Resistance: 0%
- ACS Anomaly Limit: 999
AC6 HA-T102 Juggernaut Boss Mission
HA-T102 Juggernaut in Armored Core 6 Fires of Rubicon can be first found in the mission Operation Wallclimber. The main objective of this mission is to attack the base and get through the wall. To do so, players will first need to clear the field of gatling cannons and tetrapod MT's, there are quite a few of them. Once the field is clear, players can make their way inside the wall while needing to clear the area of smaller machines as well. Once that as well is complete, players can make their way to the top of the wall to destroy the Juggernaut. The juggernaut's life bar is quite thick and takes some time to destroy it, memorizing its attack pattern and dodging out of the way of its charges and drifts, and players will be able to take down the juggernaut and complete the mission.
AC6 HA-T102 Juggernaut Boss Guide
HA-T102 Juggernaut Boss Video Guide
[video coming soon]
AC6 HA-T102 Juggernaut Boss Fight Strategy
The Best Frame Parts, Units, and other builds to defeat HA-T102 Juggernaut.
- The HA-T102 Juggernaut will always begin the fight by attempting to ram you with its Crashing Charge. If you get hit, it can potentially overload your AC immediately. Try to Quick Boost or jump away whenever the Juggernaut charges toward you.
- The front part of the HA-T102 Juggernaut is impervious to damage due to its thick armor plating, so you should deal damage by overloading its ACS by circling around and attacking it from its sides or from the rear.
- You will be accompanied by V.IV Rusty during this fight and the HA-T102 Juggernaut will focus most of its attention on him so use that to your advantage and accustom yourself and find opportunities when to fire and strike.
- The HA-T102 Juggernaut will launch rockets from the longer barrel at you, and you will have to dodge out of the way to avoid the attack.
- From its smaller barrels on the side, the HA-T102 Juggernaut will launch smaller missiles that will track you when you're farther away. Get close or dodge out of the way of the attack to avoid getting damaged.
- The HA-T102 Juggernaut will perform a drift after charging at players, it will sometimes leave a trail of bombs when doing so. When this happens, you can make an upward thrust or dodge out of the way of the bombs as they do cover a large AoE upon exploding.
HA-T102 Juggernaut Attacks & Counters
| Attack | Description | Counter |
| Phase 1 | ||
| Crashing Charge | Revs its wheels in place for a brief moment and quickly charges toward your AC. It can either move forward or backward depending on your position. | Quick Boost to either side of the Juggernaut. |
| Quick Turn | Revs its treads similarly to if it was about to charge but instead will spin in place. | Keep your distance from the frame of the Juggernaut. |
| Missile Salvo | Releases a high volume of low-impact missiles with limited homing capabilities. | Quick Boost to either side of the salvo. |
| Heavy Kinetic Rifle | Opens fire with one or both kinetic rifles simultaneously. Deals heavy AP damage and high ACS strain. | Jump and Quick Boost to either side of the shot |
| Explosive Cannons | Fires a burst of three high-impact explosive rounds in a tight pattern or fanning spread. Shots can be aimed either horizontally or vertically. | Signaled by attack indicators around the cannons. Stay mobile and visually track the rounds, then jump, use boost movement, or Quick Boost to avoid them. |
| Phase 2 | ||
| Landmines | Releases a trail of explosive landmines in its wake during Crashing Charge; can also deploy mines while spinning during Quick Turn. | The landmines are timed explosives as well as proximity detonation, so be vigilant and maneuver around them until they explode. |
HA-T102 Juggernaut Lore, Notes & Other Trivia
- Character Lore:
- Other Notes and Trivia Go Here
Dialogue
Introduction:
N/A
During Fight:
Defeating player: N/A
After Fight:
N/A
HA-T102 Juggernaut Image Gallery
[screenshots and artwork go here]
