Attack the Watchpoint is a Mission in Armored Core 6. Create own Mission Description and Objective here. Missions are segments of the game wherein the player has to complete several objectives with their Armored Core, which usually leads to challenging Bosses at the end. This Mission will have the Augmented Human C4-621 engage hostiles at Watchpoint Delta in Northern Belius, a facility that monitors dormant Veins of Coral, to destroy its core's sensor valve. The player will have to complete this mission solo with no expected support, as the Mission will have Augmented Human C4-621 invade the Combat Zone as a mercenary. Please see Missions for a full walkthrough on other missions.
[headerimg]
General Information
- Combat Zone: Northern Belius—Watchpoint Delta
- Client: Handler Walter
- Reward: 380,000 COAM
- Max Bonus Pay: 100,000 COAM
Mission Objectives
- Annihilate the SG Squad in Sector 1
- Annihilate the SG Squad in Sector 2
- Head for Sector 3
- Destroy the AC of Unknown Affiliation
- Infiltrate Control Center and Destroy Target Device
- Destroy the PCA SP Autonomous Craft BALTEUS
Completion Unlocks
- E-Rank Arena targets
- Parts Shop Update 4
Attack the Watchpoint Map
[map coming soon]
Related NPCs
- Handler Walter
- Ayre
Bosses
Enemies
- Subject Guard MTs
- Artillery
- ENTANGLE/Sulla
- Sensor Valve
Items
Key Items
- n/a
Full Attack the Watchpoint Walkthrough
Mission Description
Have we... made Contact?" — Ayre
Walter has communicated a personal request with you to infiltrate the PCA Watchpoint and destroy the sensor valve at its core. While his motivation for sending you there remains a mystery, your job is clear: fight through multiple squads of Subject Guard MTs backed up by heavy artillery, take on a hostile AC, and then destroy the imposing PCA SP Autonomous Craft BALTEUS. The terrain in this combat zone varies greatly over the course of the mission, alternating between industrial structures and wide open spaces, so you’ll need a versatile build to handle the shifting conditions. It should also be noted that while you’ll earn 100,000 COAM in bonus pay, this is not awarded on a per-enemy destroyed basis, and is instead just a single payout upon completion.
Recommended Assembly
The enemies and the boss you'll encounter during this mission will use a lot of explosive weaponry so having the full MELANDER frame equipped is a good choice as it provides the best explosive resistance for a medium-weight frame. BALTUES is especially weak against energy damage, but they have strong pulse armor. Your build should focus on depleting that pulse armor while dealing good damage. An effective way of dealing with the enemies is to fire down and catch them within the blast radius of your plasma weapons. Depending on your preferred playstyle, you might consider swapping the LG-011 MELANDER legs for the VP-424 tetrapod legs. These legs offer impressive defensive attributes and enable sustained periods of airborne bombardment. Additionally, the VP-20D generator provides ample excess EN capacity, aiding in hastening your energy recovery, regardless of the legs you choose. Now that you have access to the Arena, it's recommended that you make an effort to defeat all F-Rank enemies and make use of the OST Chips to unlock some useful upgrades.
- R-Arm Unit: Vvc-760PR
- L-Arm Unit: Vvc-760PR
- R-Back Unit: Vvc-70VPM
- L-Back Unit: Vvc-70VPM
- Head: HD-011 MELANDER
- Core: BD-011 MELANDER
- Arms: AR-011 MELANDER
- Legs: LG-011 MELANDER
- Booster: BST-G2/P04
- FCS: FCS-G2/P05
- Generator: VP-20D
Annihilate the SG Squad in Sector 1
Click here to go to the Speedrun Walkthrough.
When you enter the combat zone, you'll first land across a base over the water. Move toward the objective marker a jump over the waters. There will be a PSA Subject Guard ahead of you in a heavy Armored Core, and another one to the right. If any of your weapons have adequate range and accuracy, you can easily take care of one of them from afar before they even notice you. Otherwise, head first to the left to take care of an immobile Enemy shooting a large Pulse Cannon.

Getting hit by these stops your Armored Core in its tracks, whether your running on the ground or flying with your thrusters so it's recommended to take care of them quickly first. Be sure to dodge its attacks as you get in close for some damage. Afterward, take care of the two nearby PSA Subject Guards if you haven't already. There'll be another Pulse Canon ahead of you on the left, quickly rush to it, applying the same tactic. Afterward, there should just be three more PSA Subject Guards, slow and heavy, on the lower levels.
Annihilate the SG Squad in Sector 2
Continue heading toward the objective marker, which should take you to a small path in between two tall structures. Sector 2 will be a landing area filled with more Enemies. As Walter will point out, there will be Enemies here with Pulse Cannons perched in the higher areas. If they catch so much as a glimpse of you, they'll fire in your direction.

Be sure to manage your thruster levels as you keep moving to dodge their attacks. Head for the one closest to you to the right. There will be a lot of structures around that can shield you from the lasers as you come in close to them. The next two will be on top of the walls further on your right. Keep yourself low first as you hug the walls, making sure to dodge the attacks from the one shooting from the center of the area, and then head up to the two Enemies nearby when you're ready. Use the random structures on the ground to get in close to the central cannon and put a stop to it.
Head for Sector 3
Once you've cleared them out, head for the objective marker, which will lead you past a high platform in between two pillars.

Walter will mark the location of your actual target ahead of you, past a bridge. Make your way to it and you'll be stopped a bit past halfway across the bridge.
Destroy the AC of Unknown Affiliation
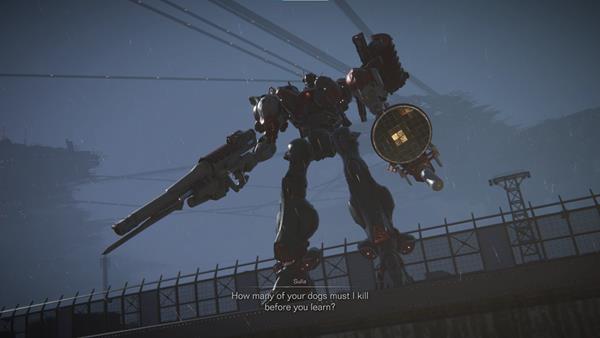
A first-gen Augmented Human appears, by the name of ENTANGLE/ Sulla, who taunts both you and Walter. You'll have to defeat him to be able to move forward. ENTANGLE/ Sulla's Armored Core will be faster than the rest of the Armored Cores you've fought so far.

He'll be equipped with a Unit that shoots a couple of spheres of electricity at you. They don't travel too fast so you should be able to dodge them easily. Aside from that, his Armored Core also comes equipped with several Missile Launchers, so you'll have to keep yourself moving and manage your thruster levels. You might find him cornered by structures several times during the battle, and you should capitalize on this if you have any melee-type Units equipped.
Note for NG++: On your third playthrough, He'll be accompanied by 4 "Ghosts" (the invisible laser sniper MT). Two will be positioned at the Watchpoint platform, at a middle range from the road, and two will be atop the buildings you passed by on your way here.

However, make sure to break away instantly after getting a couple of hits in as he'll get to hit you point-blank if you don't. Be careful going over the water and keep a close eye on your health and thruster levels, and you should eventually be able to inch out a win.
Infiltrate Control Center and Destroy Target Device
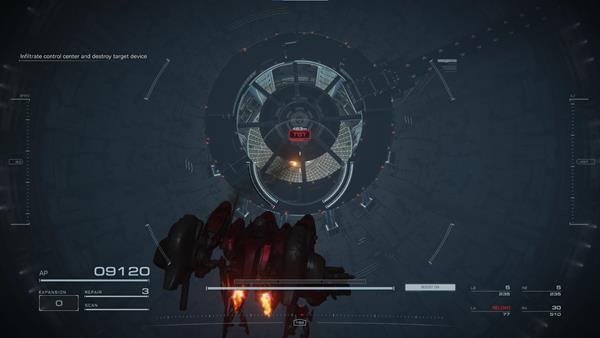
After he goes down, Walter will mark your target again so head to it. It should just be on the ground floor. You'll have to have your systems hack the hangar and get it opened. Just get close enough and hit Access to do so. Inside, make sure to resupply if you have to, to prepare for the coming fight. When you're ready, move forward along the short hall and then into a large chamber. The target device that Walter wants you to destroy is down below.

Head down and then hit the marked target with any of your Units. It should go down with a few hits. It will fully explode when you've done enough damage. You'll be told by Walter to come out as you watch the effects of your actions.
Destroy the PCA SP Autonomous Craft BALTEUS
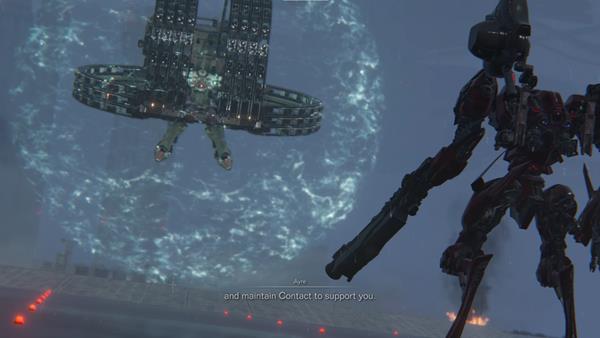
When you come to, you'll be inside your Armored Core floating down outside the main facility. Flying straight at you for a greeting will be the AAP07: BALTEUS, probably sent over as reinforcements by the PCA SP. As with most bosses, it'll have its Pulse Shield on when you engage, so you'll want to take that down first with the appropriate Units you have. Its body structure is made up of a ton of missile launchers and it'll make good use of it to start.

Keep on your toes but watch your thruster levels, as always. When it sends all its missiles at you, it'll be a good chance to rush in with some melee attacks or point-black blasts. When its shields are down, keep the pressure up and pile on the attacks.

As it moves, it'll switch to single attacks, and some rounds with its gat. Dodge them and get some hits in to take down its shields again. When it starts staggering, you can get behind it and keep it stunned by piling on some attacks. Be careful with this close-ranged tactic and always be ready to clear out when you see it building up some energy for a close-ranged shock blast. Keep the strategy up and eventually, it will go down.
Attack the Watchpoint Map
Map Coming Soon
Attack the Watchpoint Speedrun Walkthrough
When you land, head across the water to your first Enemies. There'll be three in your immediate vicinity - one in front and to your right on heavy Armored Cores, and one planted up high to your left periodically shooting large pulse blasts. While they haven't spotted you yet, hit one with a sneaky shot and then take care of the rest. After them will be one more stationary Pulse Cannon, leading three more of the same Armored Cores. Move forward to the marker into a section with four Pulse Cannons this time, watching the ground level. Use the structures as shields from their attacks as you move around to dispatch them quickly.
After destroying the snipers, the marker will have you head to the actual facility, across a long bridge. You'll be stopped by ENTANGLE/ Sulla in a nimbler Armored Core, equipped with a rapid-fire pulse gun that shoots consecutive pulse orbs, and a variety of missile launchers. Use the terrain to your advantage to corner him and get some sure-hits in. Keep watch over his moves and dodge whenever necessary. He should go down eventually.
Past him will be the control center of the facility. Infiltrate it and resupply your Armored Core as needed inside. Move further into a large chamber and find the target device down below. Head down and destroy it with a couple of hits from your Units.
Afterward, the PCA SP will send in their response through a Boss battle against the AAP07 BALTEUS. The ring around this Armored Core, as well as a good portion of its body, is made up of missile launchers. When it starts launching missiles at you like fireworks, move in close to get some hits in and bring down its shields. When the shields are down, keep on the pressure and keep going for damage. When you see it charging up some electricity, be prepared to quickly move away to dodge a close-ranged shock blast. Repeat the process until it goes down and reap your reward for cleaning the Mission.
For anyone struggling with Balteus, this build made the fight a matter of 2-3 attempts after literal hours of attempts with other builds:
R-Arm Unit: MG-014 LUDLOW
L-Arm Unit: MG-014 LUDLOW
R-Back Unit: VP-60LCS
L-Back Unit: VP-60LCS
Head: HD-011 MELANDER
Core: DF-BD-08 TIAN-QIANG
Arms: DF-AR-08 TIAN-QIANG
Legs: LG-022T BORNEMISSZA
Booster: (NOTHING)
FCS: FC-006 ABBOT
Generator: VP-20D
The trick is actually to stay very close to the boss, and abuse your tankiness. Spam quick boost when the missile attacks come out, and always remain moving. Don't charge the laser cannons on your shoulder. Spam them uncharged whenever your ludlows are reloading. Just keep boosting and stay on him. You should be able to spam him down in only a few attempts.
Anyone struggling with the boss due to the shields. there is a weapon that can and will shred the shield real fast. in fact i discovered it when i was fighting this guy and i am near end game i still use them. they do ton of stun damage to anyone using a handheld shield. shred other types of shields. and deal a lot of damage if you have the right setup and mech.
HI-16: GU-Q1
i recommend grabbing 2 of them to shred the boss's shields really fast and don't forget about the Wapons's Bay skill. it can help you grab 2 other hand weapons if you want.

Beat this guy on the third try. Bipedal TIAN-QIANG armor, dual plasma cannons, and dual shoulder plasma launchers. Stay in his face and pummel him continuously with single shots from the plasma cannons (don't bother charging up the shot, you don't want those guns to overheat). Switch to shoulder launchers before your cannons would overheat. Even if the boss zips away, those shoulder launcher rounds will follow him and make him into mincemeat.
0
+10
-1